
Ingredients
-
3 cups all-purpose flour (or bread flour for a chewier texture) 🌾
-
1 1/4 teaspoons salt 🧂
-
1/4 teaspoon active dry yeast (yes, just a tiny amount!) 🍞
-
1 1/2 cups warm water (about 100°F–110°F/38°C–43°C) 💧
-
Optional: 1–2 tablespoons olive oil (for added softness)
Instructions
Step 1: Mix the Dough
In a large mixing bowl, combine the flour, salt, and yeast. Stir to evenly distribute the ingredients.
Add the warm water (and optional olive oil) to the dry ingredients. Stir with a wooden spoon or spatula until a shaggy dough forms. The dough will be sticky—that’s okay!
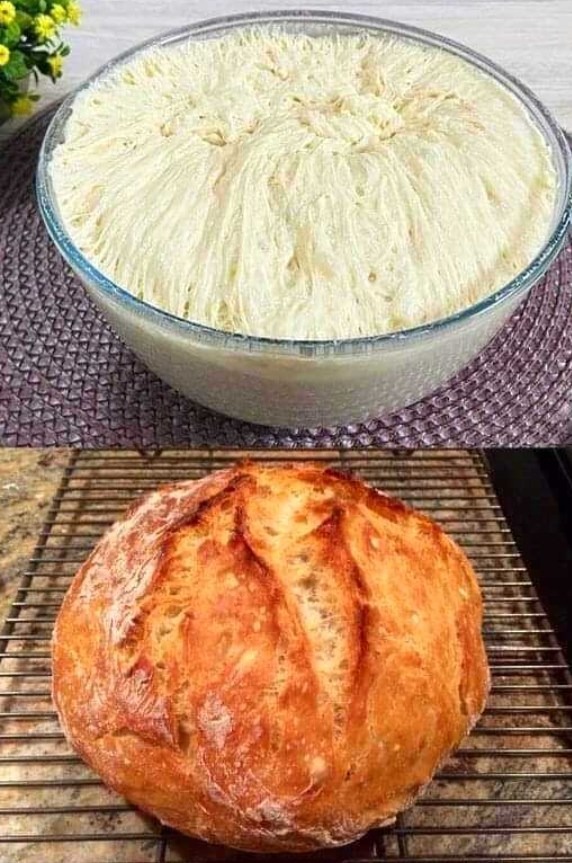
Cover the bowl with plastic wrap, a damp kitchen towel, or a lid, and let it sit at room temperature for 8–12 hours (overnight works perfectly). The dough will rise and develop bubbles as it ferments.
Step 2: Shape the Dough
After the dough has risen, lightly flour your work surface and turn the dough out onto it.
Gently fold the dough over itself a few times to shape it into a ball. Don’t overwork it—this step is just to create structure.
Place the dough ball seam-side down onto a piece of parchment paper or into a well-floured proofing basket (if you have one).
Step 3: Second Rise
Cover the shaped dough loosely with a clean kitchen towel and let it rest for 30–60 minutes, or until it puffs up slightly.
Step 4: Preheat and Bake
Place a heavy Dutch oven (with lid) in your oven and preheat it to 450°F (230°C). Let the pot heat up for at least 30 minutes before baking.
Carefully remove the hot Dutch oven and transfer the dough (using the parchment paper for easy handling) into the pot.
Use a sharp knife or razor blade to score the top of the dough with a shallow slash (this helps the bread expand while baking).
Cover the pot with the lid and bake for 30 minutes.
Remove the lid and bake for an additional 10–15 minutes, or until the crust is deep golden brown and the bread sounds hollow when tapped on the bottom.
Step 5: Cool and Slice
Transfer the bread to a wire rack and let it cool completely before slicing. This allows the crumb to set properly.
Tips and Variations
see next page
Ingredients
-
3 cups all-purpose flour (or bread flour for a chewier texture) 🌾
-
1 1/4 teaspoons salt 🧂
-
1/4 teaspoon active dry yeast (yes, just a tiny amount!) 🍞
-
1 1/2 cups warm water (about 100°F–110°F/38°C–43°C) 💧
-
Optional: 1–2 tablespoons olive oil (for added softness)
Instructions
Step 1: Mix the Dough
In a large mixing bowl, combine the flour, salt, and yeast. Stir to evenly distribute the ingredients.
Add the warm water (and optional olive oil) to the dry ingredients. Stir with a wooden spoon or spatula until a shaggy dough forms. The dough will be sticky—that’s okay!
Cover the bowl with plastic wrap, a damp kitchen towel, or a lid, and let it sit at room temperature for 8–12 hours (overnight works perfectly). The dough will rise and develop bubbles as it ferments.
Step 2: Shape the Dough
After the dough has risen, lightly flour your work surface and turn the dough out onto it.
Gently fold the dough over itself a few times to shape it into a ball. Don’t overwork it—this step is just to create structure.
Place the dough ball seam-side down onto a piece of parchment paper or into a well-floured proofing basket (if you have one).
Step 3: Second Rise
Cover the shaped dough loosely with a clean kitchen towel and let it rest for 30–60 minutes, or until it puffs up slightly.
Step 4: Preheat and Bake
Place a heavy Dutch oven (with lid) in your oven and preheat it to 450°F (230°C). Let the pot heat up for at least 30 minutes before baking.
Carefully remove the hot Dutch oven and transfer the dough (using the parchment paper for easy handling) into the pot.
Use a sharp knife or razor blade to score the top of the dough with a shallow slash (this helps the bread expand while baking).
Cover the pot with the lid and bake for 30 minutes.
Remove the lid and bake for an additional 10–15 minutes, or until the crust is deep golden brown and the bread sounds hollow when tapped on the bottom.
Step 5: Cool and Slice
Transfer the bread to a wire rack and let it cool completely before slicing. This allows the crumb to set properly.
Tips and Variations
see next page
