
1. Select and Prepare the Parent Plant
- Choose a healthy stem: Look for a branch that is roughly the thickness of a pencil, healthy, and semi-mature (not too woody or too green).
- Cut the stem: Using clean pruning shears, make a diagonal cut just below a leaf node (the point where a leaf grows from the stem). The cutting should be around 6-8 inches long.
- Trim the leaves: Remove all but the top two sets of leaves. This reduces moisture loss and helps the cutting focus its energy on root development.

2. Apply Rooting Hormone (Optional but Recommended)
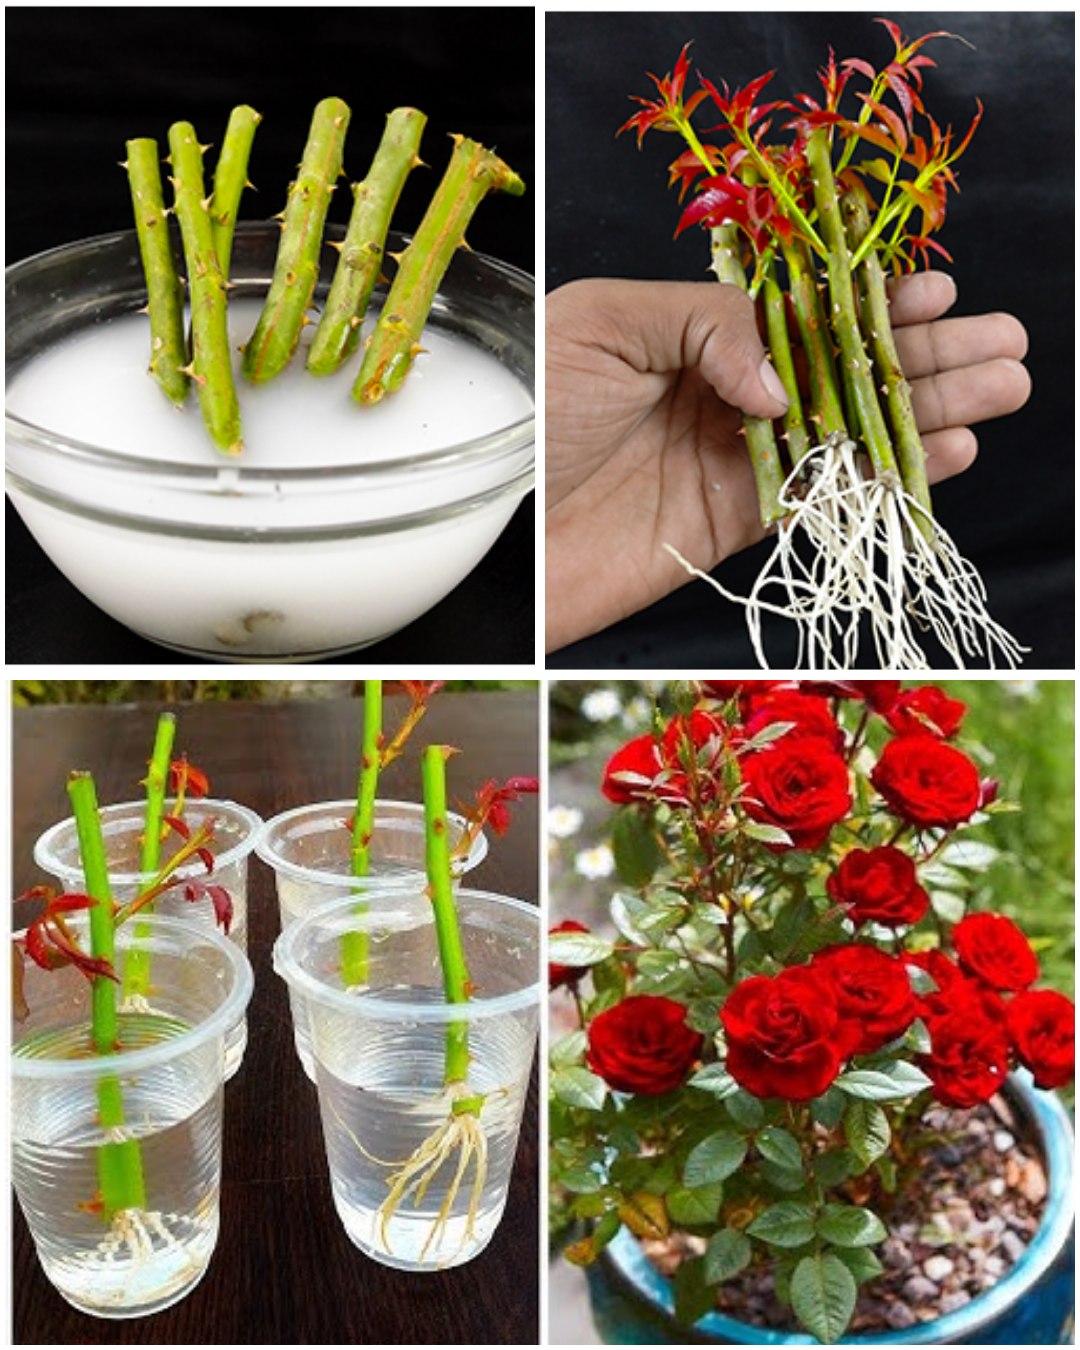
- Dip in rooting hormone: If you have rooting hormone, dip the cut end of the rose cutting into it. This helps encourage faster and stronger root growth, increasing the chances of successful propagation.
3. Prepare the Container
- Fill with potting mix: Choose a small container or seedling tray and fill it with a well-draining potting mix. A mixture of peat and perlite works well.
- Moisten the soil: Lightly water the potting mix to ensure it’s evenly moist, but not soggy.
4. Plant the Cutting
- Insert the cutting: Push the cut end of the rose cutting about 2-3 inches deep into the potting mix.
- Firm the soil: Gently press the soil around the cutting to ensure good contact between the stem and soil, which helps with root formation.
5. Create a Mini Greenhouse
- Cover with plastic: Create a humid environment for the cutting by covering the pot with a plastic bag or wrap. Secure it with rubber bands or twist ties around the pot, ensuring the plastic doesn’t touch the cutting.
- Ventilation: Keep the edges of the plastic slightly loose to allow airflow and prevent mold.
6. Provide Adequate Moisture
- Water thoroughly: After planting, water the cutting well to settle the soil. Keep the soil consistently moist but not waterlogged.
- Mist the cutting: If possible, mist the cutting or the inside of the plastic covering to maintain humidity.

7. Place in Indirect Light
- Bright, indirect sunlight: Position the cutting in a location that receives bright but indirect sunlight. Avoid direct sunlight, which can cause the cutting to overheat.
8. Monitor and Wait
see next page
1. Select and Prepare the Parent Plant
- Choose a healthy stem: Look for a branch that is roughly the thickness of a pencil, healthy, and semi-mature (not too woody or too green).
- Cut the stem: Using clean pruning shears, make a diagonal cut just below a leaf node (the point where a leaf grows from the stem). The cutting should be around 6-8 inches long.
- Trim the leaves: Remove all but the top two sets of leaves. This reduces moisture loss and helps the cutting focus its energy on root development.
2. Apply Rooting Hormone (Optional but Recommended)
- Dip in rooting hormone: If you have rooting hormone, dip the cut end of the rose cutting into it. This helps encourage faster and stronger root growth, increasing the chances of successful propagation.
3. Prepare the Container
- Fill with potting mix: Choose a small container or seedling tray and fill it with a well-draining potting mix. A mixture of peat and perlite works well.
- Moisten the soil: Lightly water the potting mix to ensure it’s evenly moist, but not soggy.
4. Plant the Cutting
- Insert the cutting: Push the cut end of the rose cutting about 2-3 inches deep into the potting mix.
- Firm the soil: Gently press the soil around the cutting to ensure good contact between the stem and soil, which helps with root formation.
5. Create a Mini Greenhouse
- Cover with plastic: Create a humid environment for the cutting by covering the pot with a plastic bag or wrap. Secure it with rubber bands or twist ties around the pot, ensuring the plastic doesn’t touch the cutting.
- Ventilation: Keep the edges of the plastic slightly loose to allow airflow and prevent mold.
6. Provide Adequate Moisture
- Water thoroughly: After planting, water the cutting well to settle the soil. Keep the soil consistently moist but not waterlogged.
- Mist the cutting: If possible, mist the cutting or the inside of the plastic covering to maintain humidity.
7. Place in Indirect Light
- Bright, indirect sunlight: Position the cutting in a location that receives bright but indirect sunlight. Avoid direct sunlight, which can cause the cutting to overheat.
8. Monitor and Wait
see next page
